The living room was one of our very first projects because in just a few weeks my mom would arrive in a moving truck carrying my grand piano. Since pianos generally don't respond well to wet plaster falling from the ceiling as we scrape off popcorn, or sawdust from crown molding and refinishing floors, or splatter of wet paint...we had to hurry.
August 27, 2010
August 26, 2010
The Dining Room and Hallway: Part II
 |
| We had to "borrow" this molding to frame the french doors in the living room. |
 | ||||
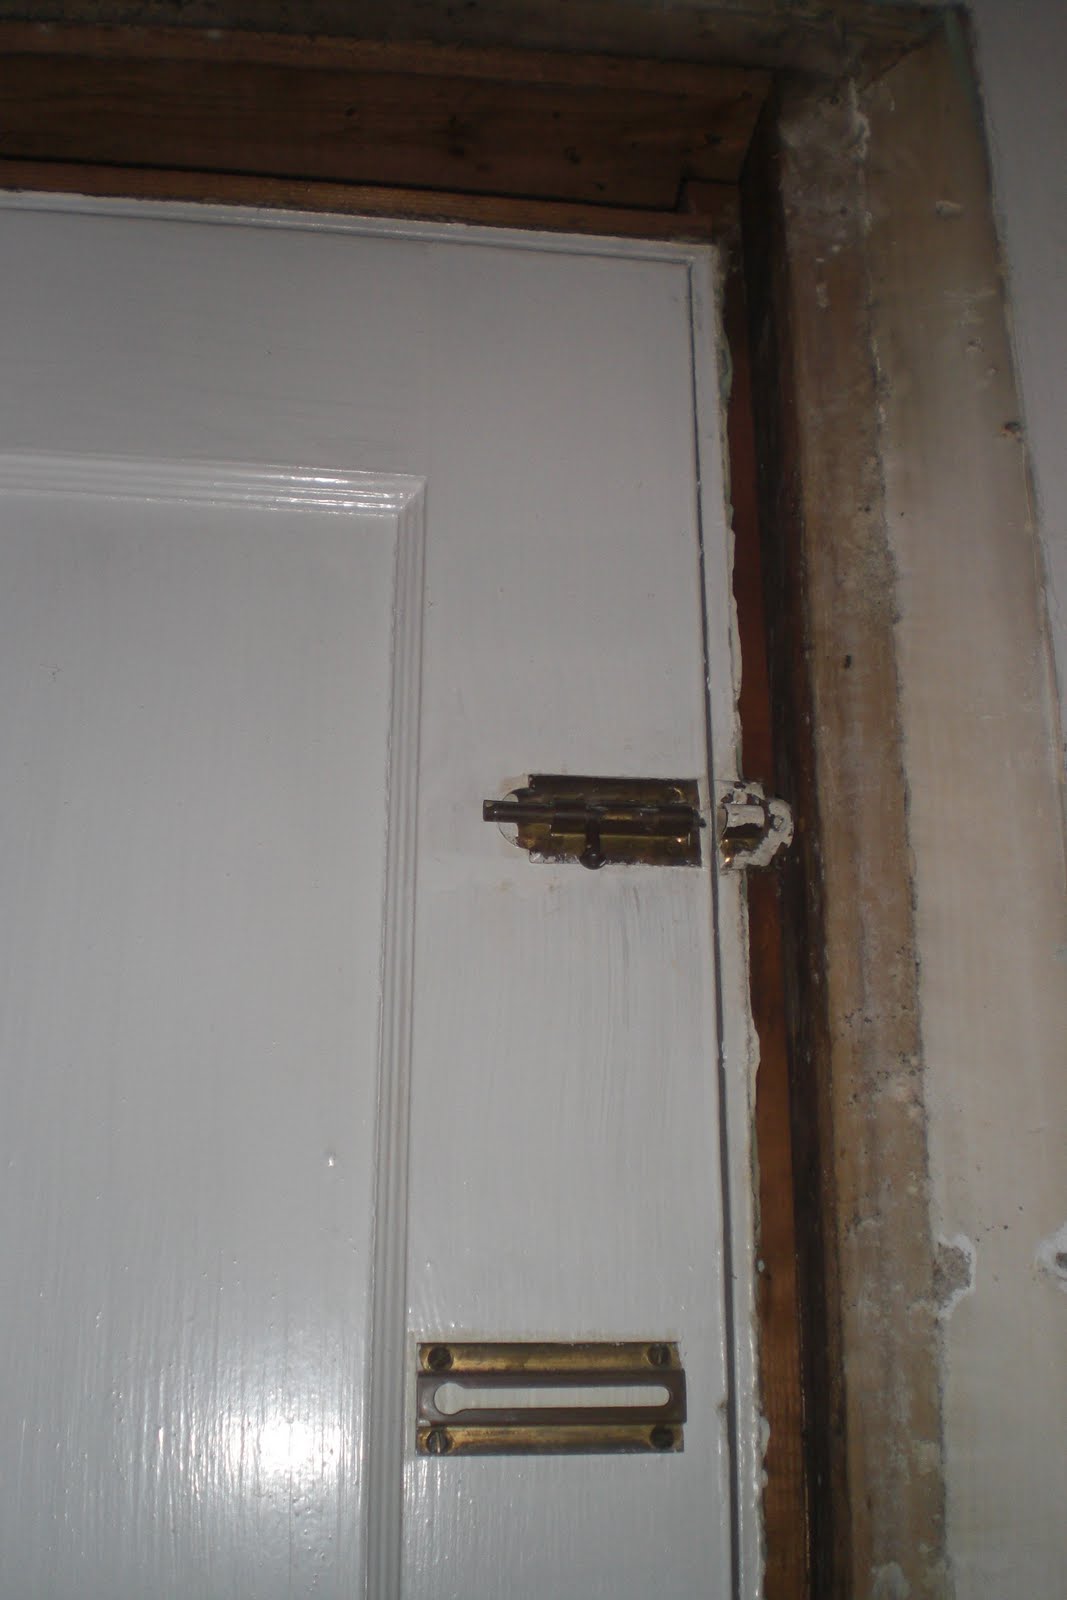
| But don't worry, we still gave this door some nice molding. So nice that we drove 2 hours to get it. The best part was driving home those 2 hours on the freeway with a big stack of molding sticking out the back of our trunk. |
 | ||||||||||||
  |

 |
| Finished product. |
 |
| The curtains replaced the glass doors that once covered the closet but now live at the dump. |
 |
| Our tool closet still hides behind the curtain. Someday all our saws and hammers and paint will move into the attic...but not yet. |

 |
 |
| Dining room furniture courtesy of craigslist. |
August 25, 2010
The Dining Room and Hallway: Part I
The house as we found it.
 This corner photo really captures the essence of the room. Not one, not two, but three mismatched types of paneling. Two clashing brown walls with 2 mismatched white walls. Mismatched crown molding. Three types of mismatched baseboards (not shown). Mismatched door frames. and it continues...
 ....70's glass doors over a closet that smells like urine. 70's light fixture (which, by the way, is 2 1/2 feet off center). And of course, popcorn ceiling.
 Here is what the dining room looked like when my mom was visiting: packed with furniture and beds. We all slept there because we were refinishing the wood floors and couldn't put furniture on them for 3 days. Did I ever tell you my mom is a saint?
Above: a view of the hallway looking towards the living room. (This paneling was also on 1 of the walls in the dining room, opposite the other dark brown paneling. Real nice.)
Below: a view of the hallway looking towards the kitchen. The dining room is on the left, the door to the cellar is on the right.

 This is what the hallway looked like when Chris took off the unfortunate brown paneling. Apparently somewhere along the line the wall was added...creating the hallway and a very awkwardly placed bedroom.
This picture makes me laugh...so I had to post it again.
August 4, 2010
SECOND FLOOR: peeling back the layers
 What you are looking at is a plywood wall made to look like wood paneling on the bottom and wallpaper on top, edged with various types of "molding." Each time I look back at these pictures I'm amazed to think that the upper level was our favorite part of the house.

 A closer look at the fancy faux-wallpaper paneling.
 This shot of the study captures the acoustic tile ceiling that graced the upstairs (except the master bedroom thank goodness!). This was one of the first things to go. Fortunately for us, there was no asbestos and even more exciting was the wood slats we discovered underneath all the layers.
We filled many trash bins during those first few days.

 These next two pictures are of the nursery. Turns out our nasty paneling was covering up a darling vintage wallpaper print.
 Sadly the wallpaper was too damaged to keep. So we kept ripping things down until we arrived at...
 Wood. Just plain, sturdy wood.
I may be wrong, but I don't think they build houses this way any longer.


 The wood stayed for a long time. We called the upstairs our log cabin and really quite liked it. The biggest downside was that the walls were covered with nails. Hundreds, maybe thousands of them. They needed so many nails because that's what held up all the paneling. Anyway, all these nails would attack if I strayed too near the wall or tried to cut corners.
After a while of living in the cabin, my mother came to visit and she taught us the ways of wallpaper (because that's the only thing we could think of for the wood). The walls are too rough to put wallpaper directly on them, so we put up this thick white backing paper that is supposed to help the final wallpaper go onnicely.(see picture below). We don't know yet because we haven't found any wallpaper that 1)we like and 2)is affordable for this large of area. So everything is just white. The study and the nursery have white wallpaper only on the walls because we wanted to keep the exposed wood ceilings. Those we painted white and it's a cute rustic look.
By the way, Chris hates putting up wallpaper. That's probably because trying to wallpaper all the crazy angles and slanted lines of that hallway ceiling is a living nightmare. I try to tell him that normally it's not so bad...he doesn't believe me.

Subscribe to:
Posts (Atom)